Master Controller
Master Controller Overview
The Master Controller originated from a collaborative effort between myself and my employer to develop custom hardware solutions. At the time, we were in the process of acquiring an office building equipped with an outdated access control system that relied on Wiegand wire cards. As my first significant project, I anticipated a learning curve and potential setbacks.
Initially, I attempted to simulate a Wiegand card swipe using an Arduino, but was unsuccessful due to the challenges of debugging in less-than-ideal environments—either in a hot mechanical room or in public spaces with limited access. Ultimately, I decided to rewire the system so that bridging two wires would unlock the door through the existing controller. The first prototype consisted of an Arduino housed in a simple enclosure, with a hardcoded list of NFC card UIDs. Updating the list required removing the front panel and connecting a USB cable, which quickly proved inconvenient. To streamline this process, I added a TTL RS232 interface, allowing the software to parse a CSV file and upload it to the panel. Over time, we transitioned to using Excel spreadsheets (with native XLSX support) and eventually migrated to a MariaDB database for greater flexibility.
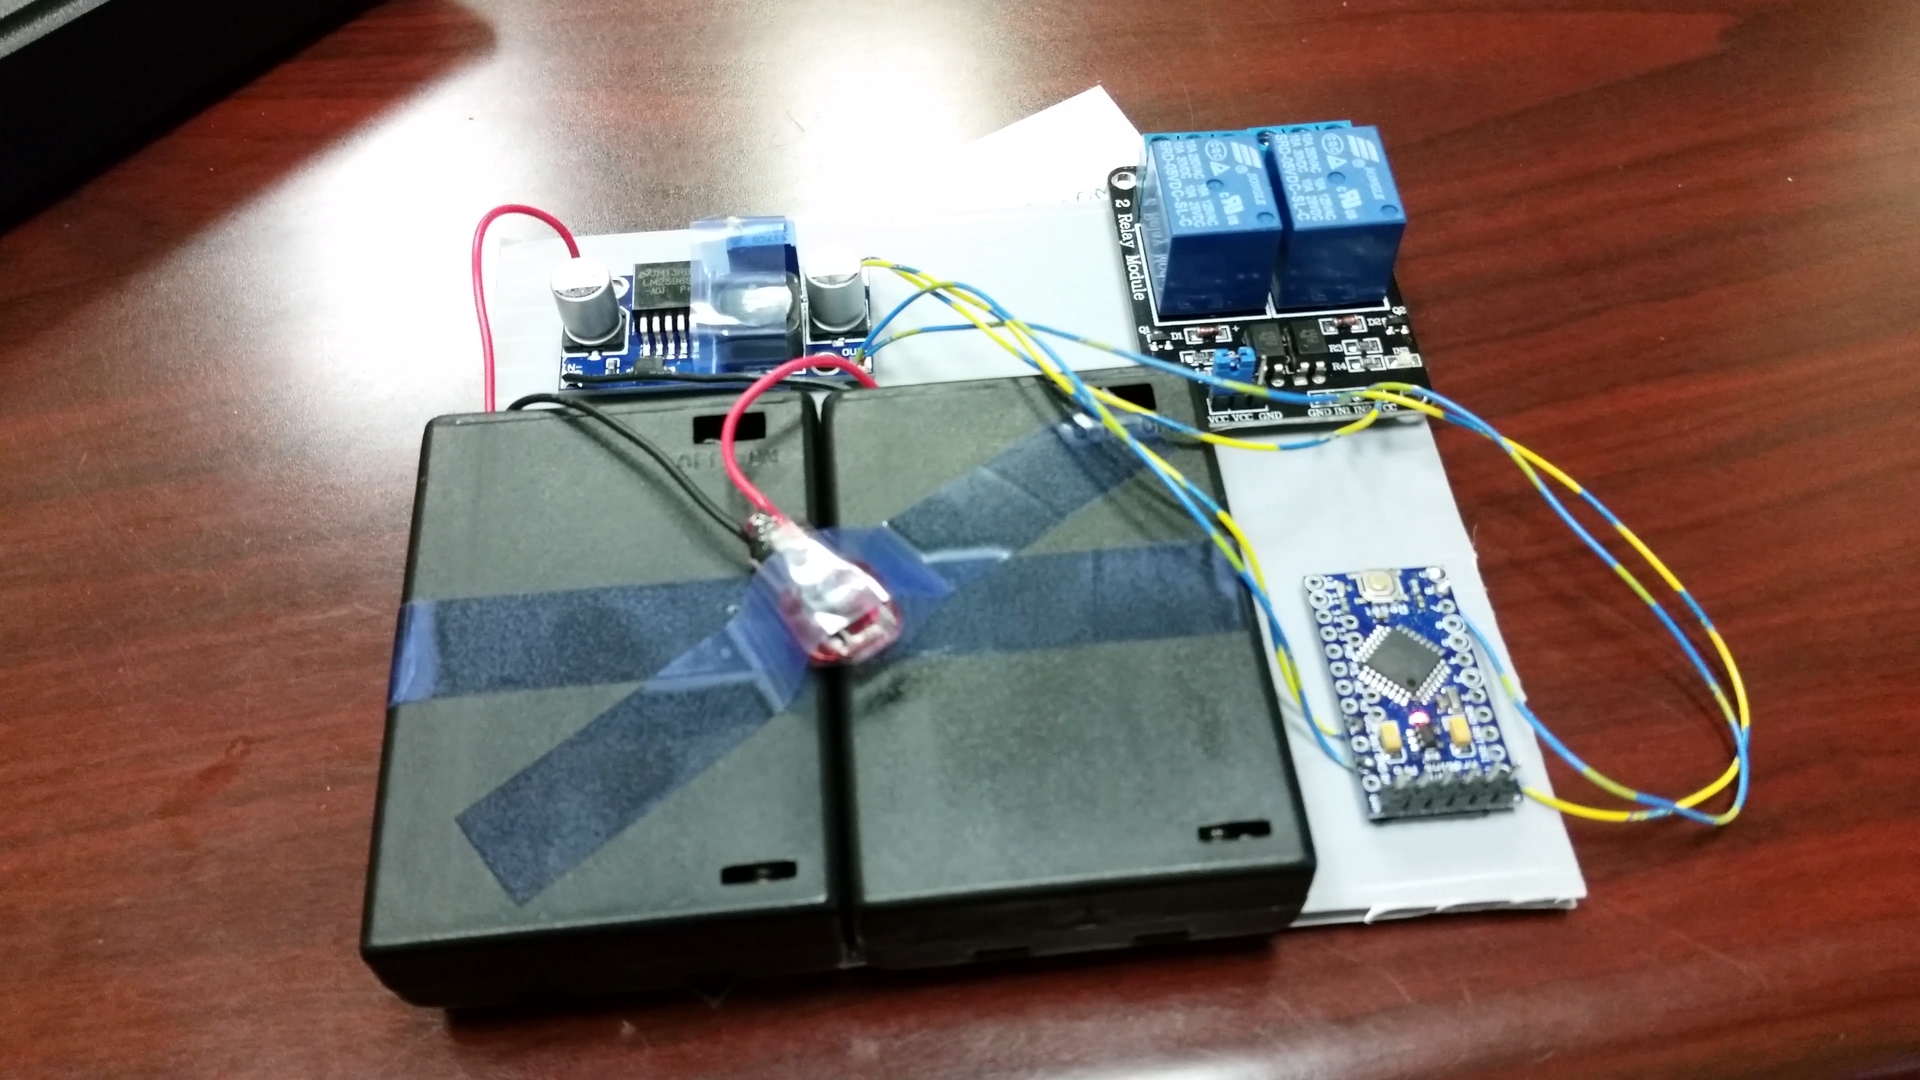
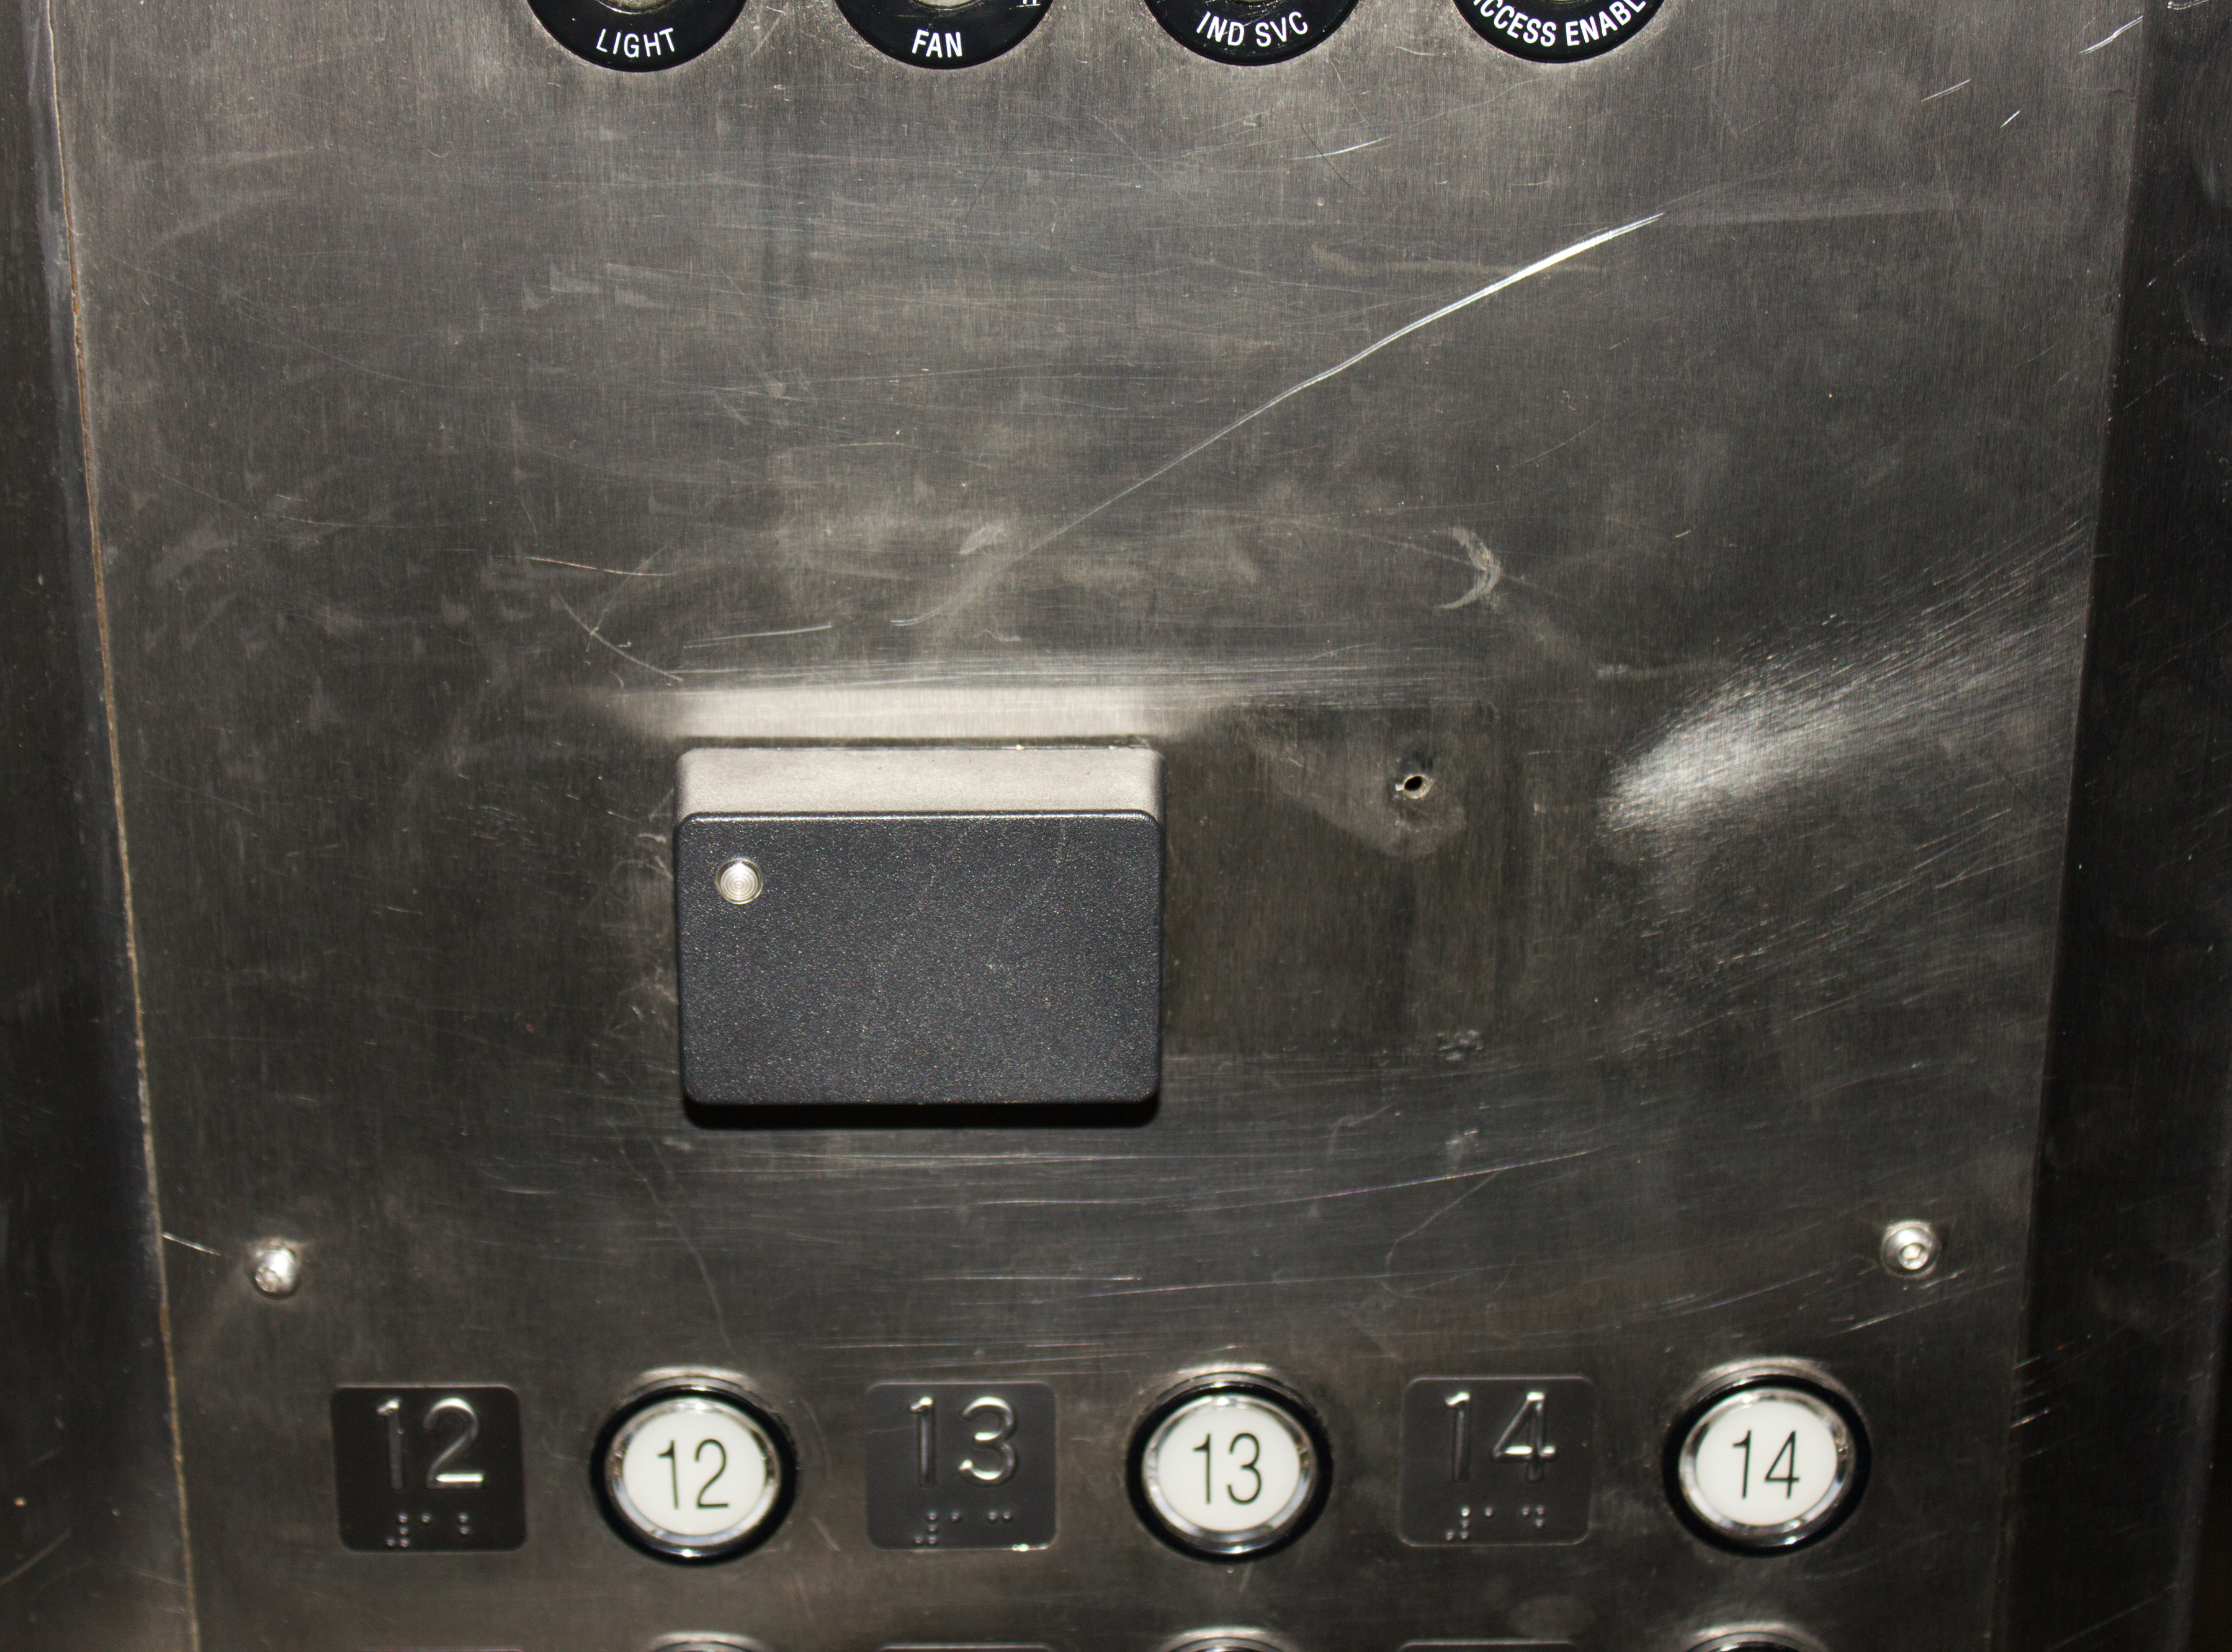
The hardware underwent several revisions. Beyond the front door panel, a battery-powered timer served as the initial version of the elevator access control system. This device interfaced with the elevator controller in the same manner as the original access control system, utilizing relays connected to an Arduino powered by a battery. It featured a basic serial interface that required a physical connection for access.
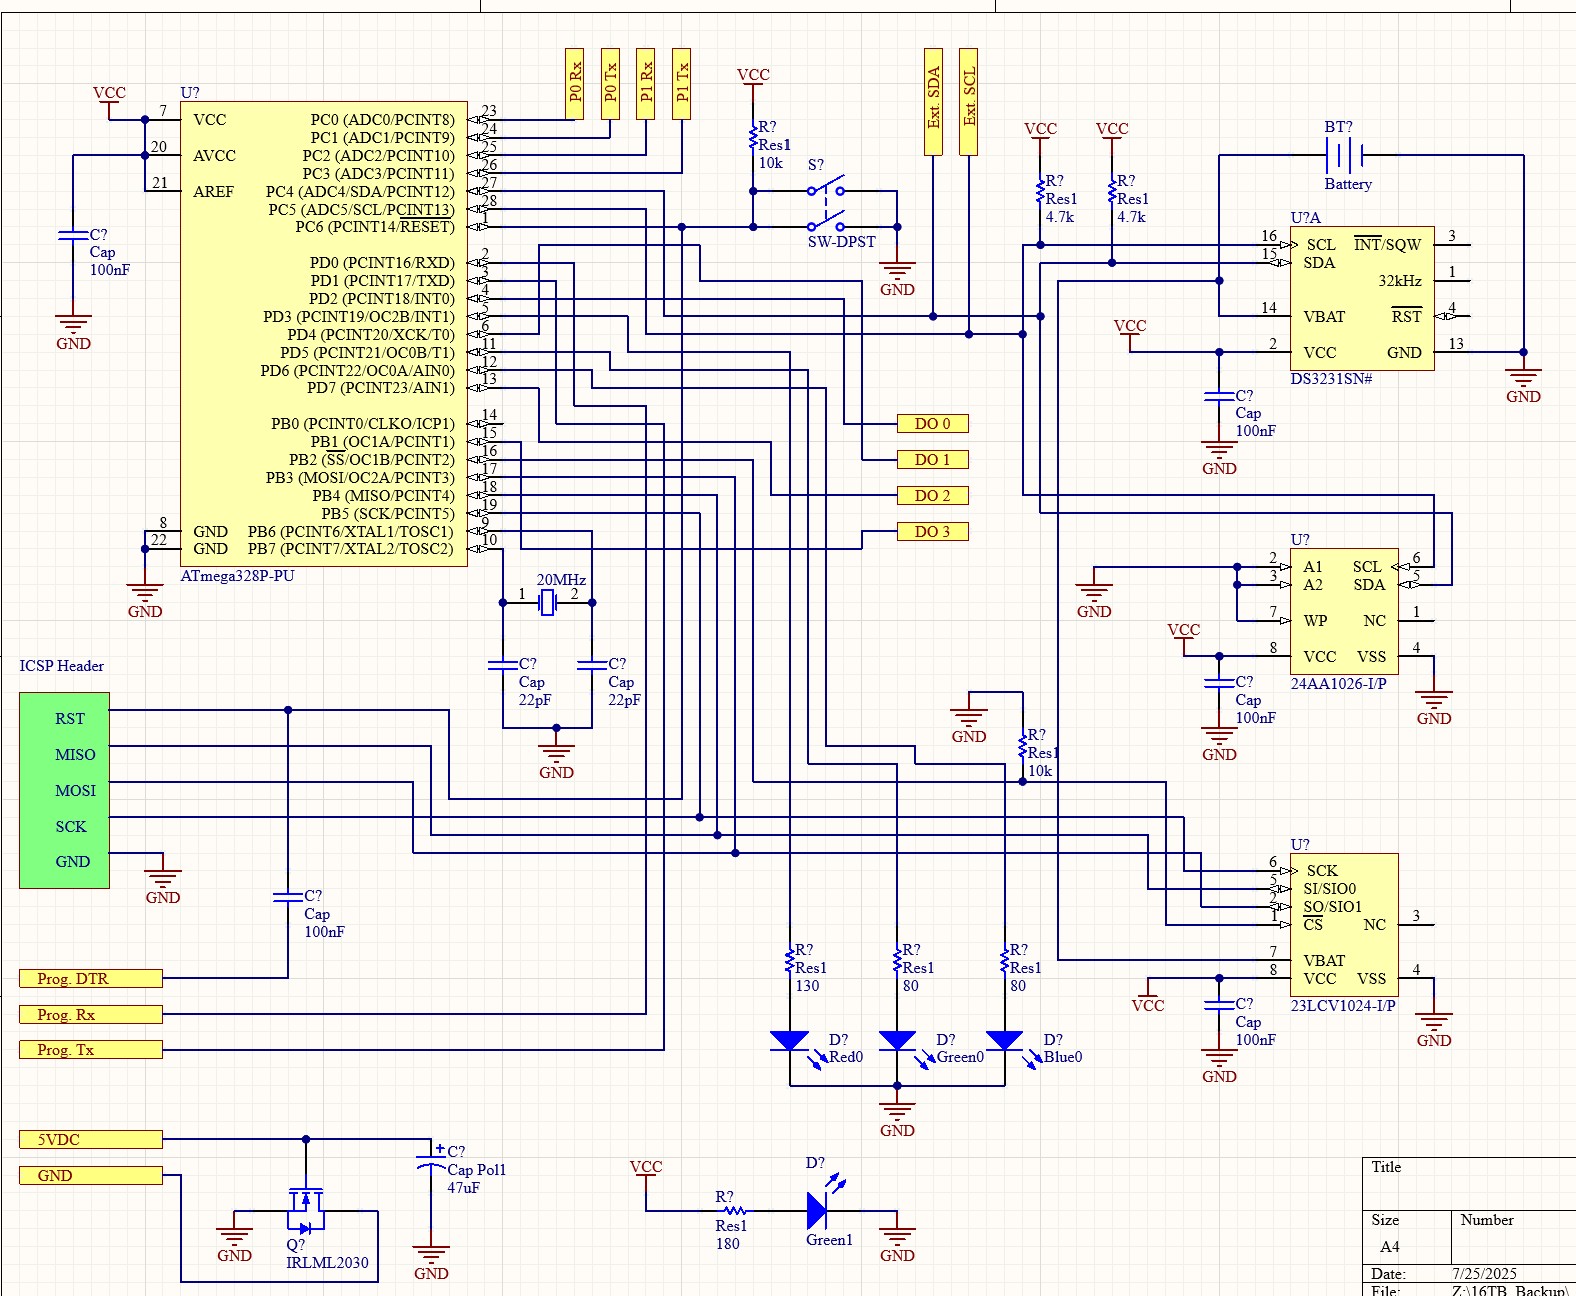
The first fully functional system capable of maintaining a card list was a hand-soldered prototype built on perfboard. This version incorporated an Arduino, RTC, EEPROMs, battery, LEDs, and several transistors. Although my understanding of transistor-based switching was limited at the time (today, I would use a triac), the circuit performed reliably and remained in service for an extended period.
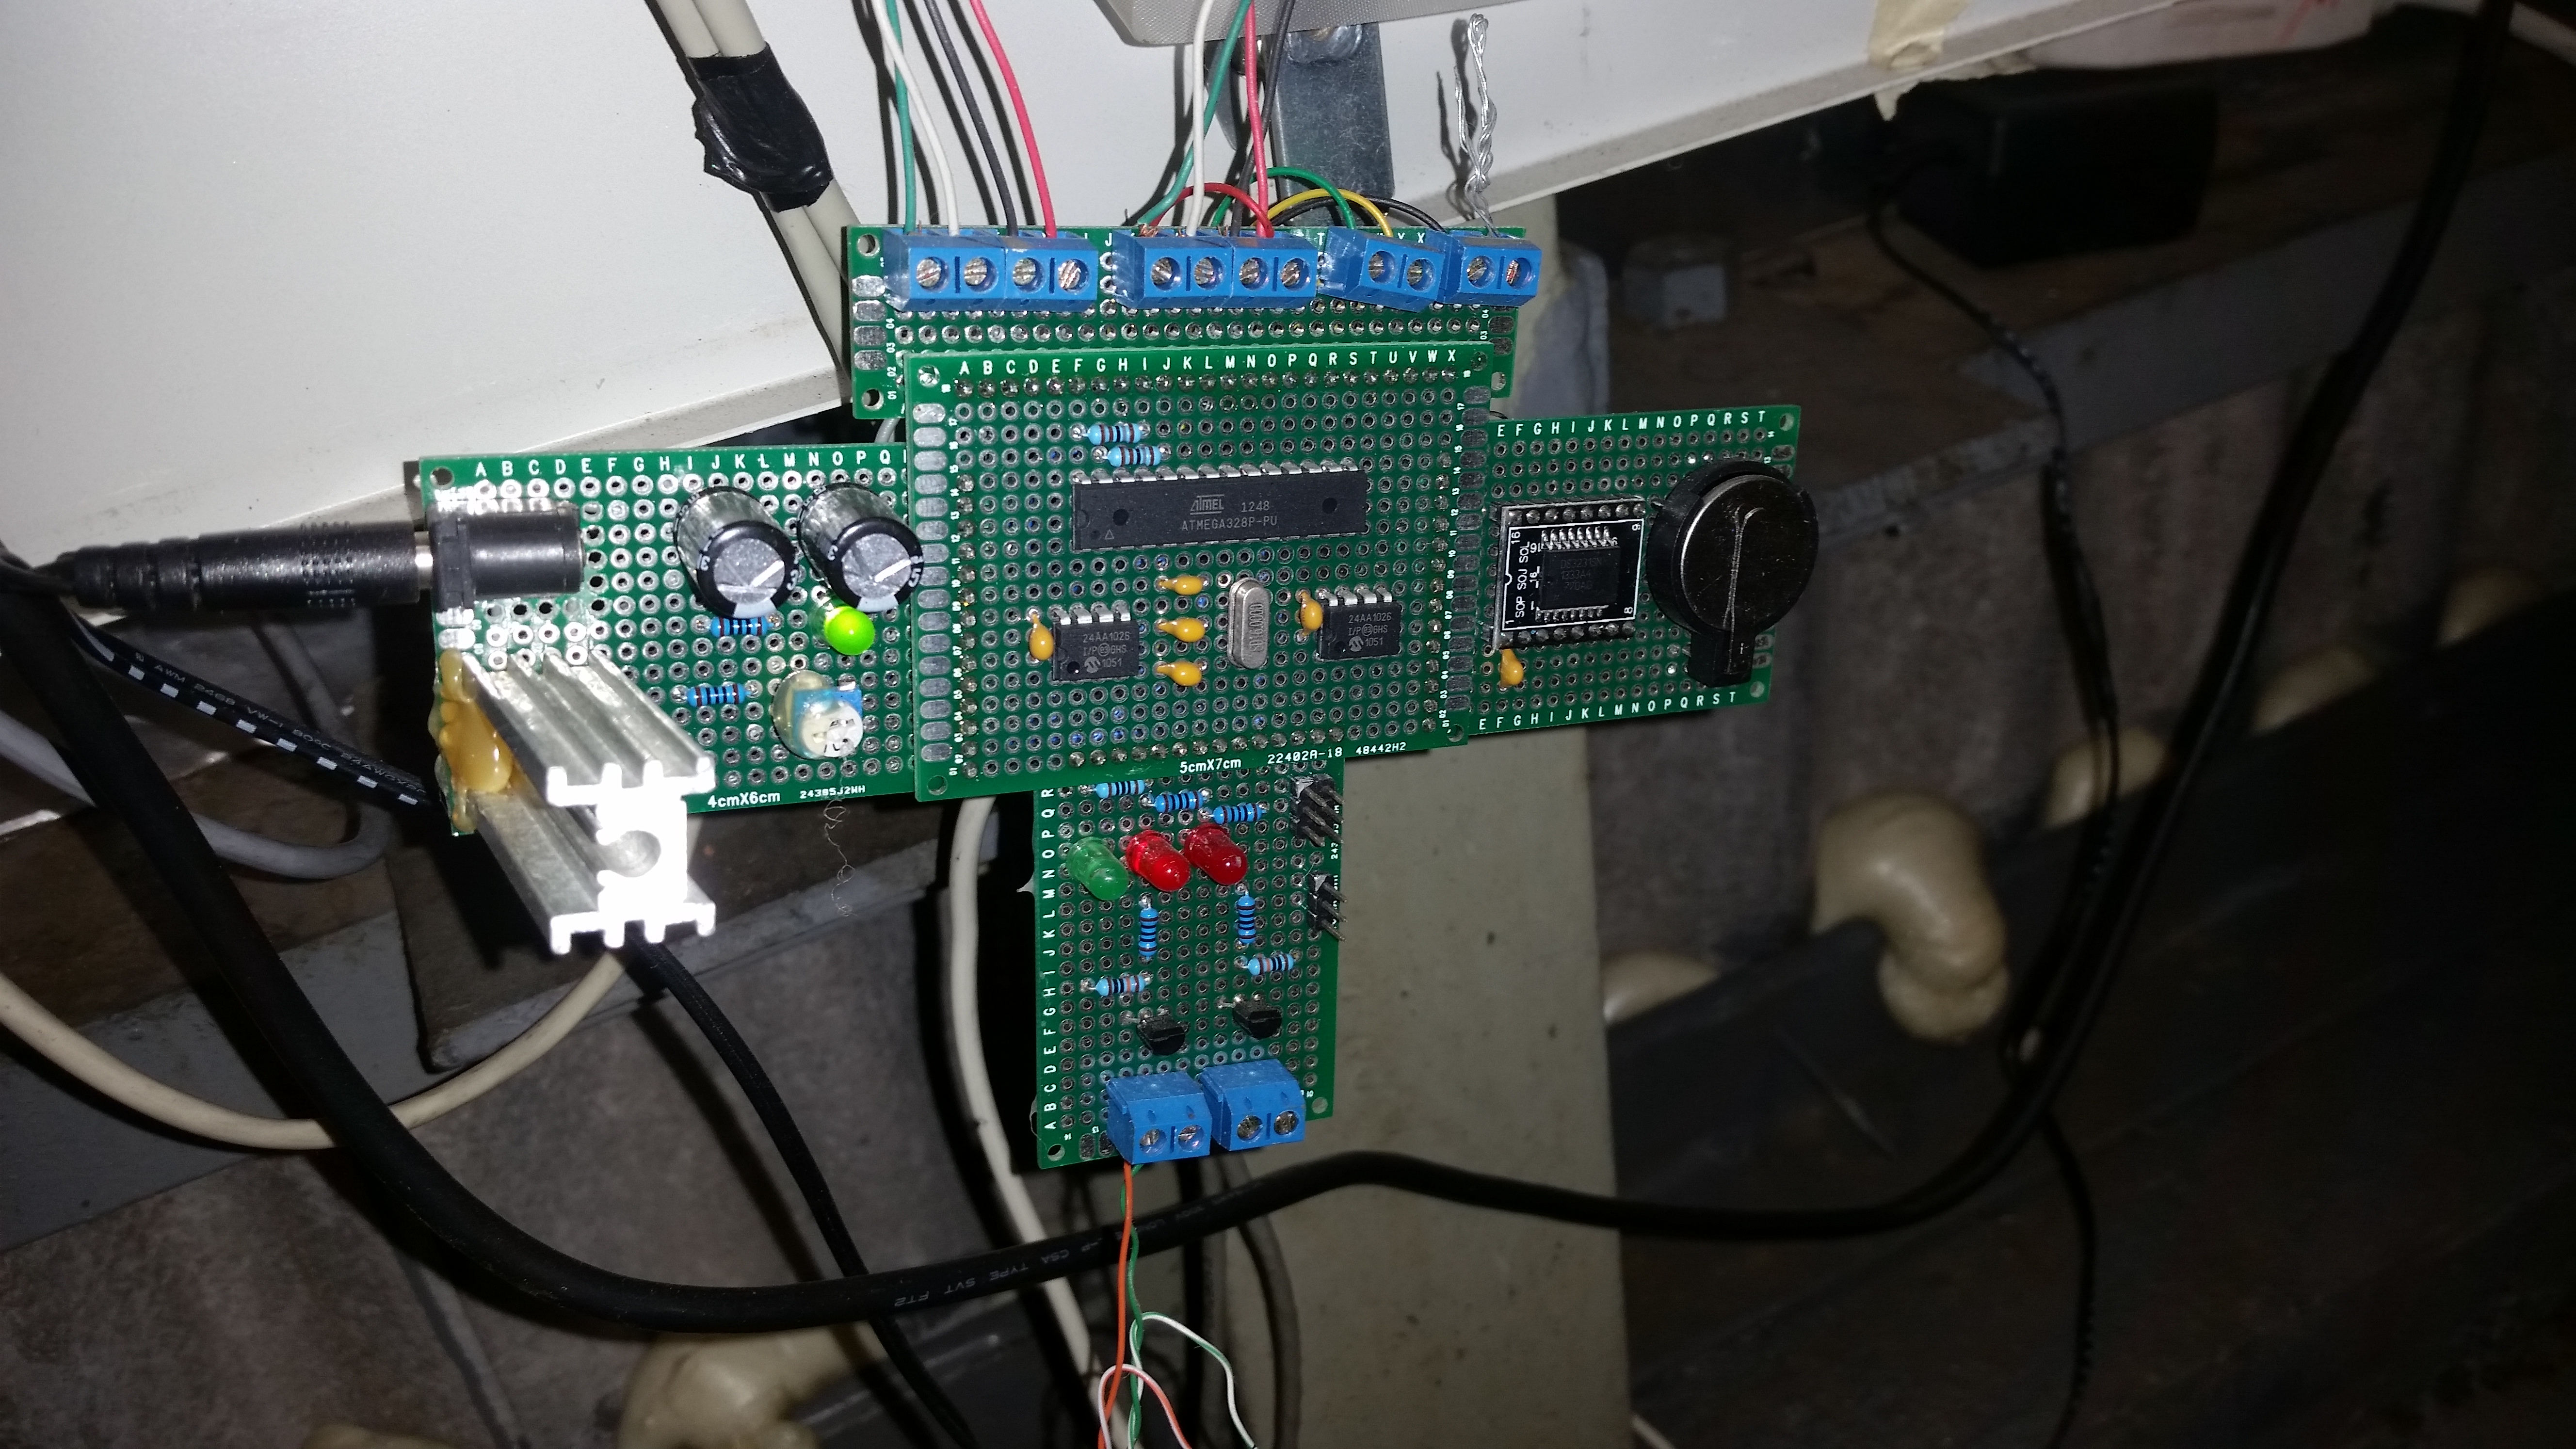
This installation remained operational well beyond the introduction of the PCB version of the controller, only being replaced once the system was fully networked and transitioned to an MQTT-based architecture. As my first fabricated PCB design, it had several shortcomings. While the routing was functional, I was dissatisfied with its aesthetics. The screw terminals had minor gaps, causing them to rotate when tightened, and the board lacked expandability. Most notably, there was no header for programming the MCU—a feature present in the original perfboard prototype. Programming required attaching test clips directly to the MCU, which often meant working in awkward positions within mechanical rooms.
Below is a photo of the control board and its schematic. The schematic, drawn in 2013, reflects my skills at the time. Interestingly, the actual PCB was laid out manually and never had a formal schematic, though the one shown here is nearly identical except for the inclusion of an ICSP header.
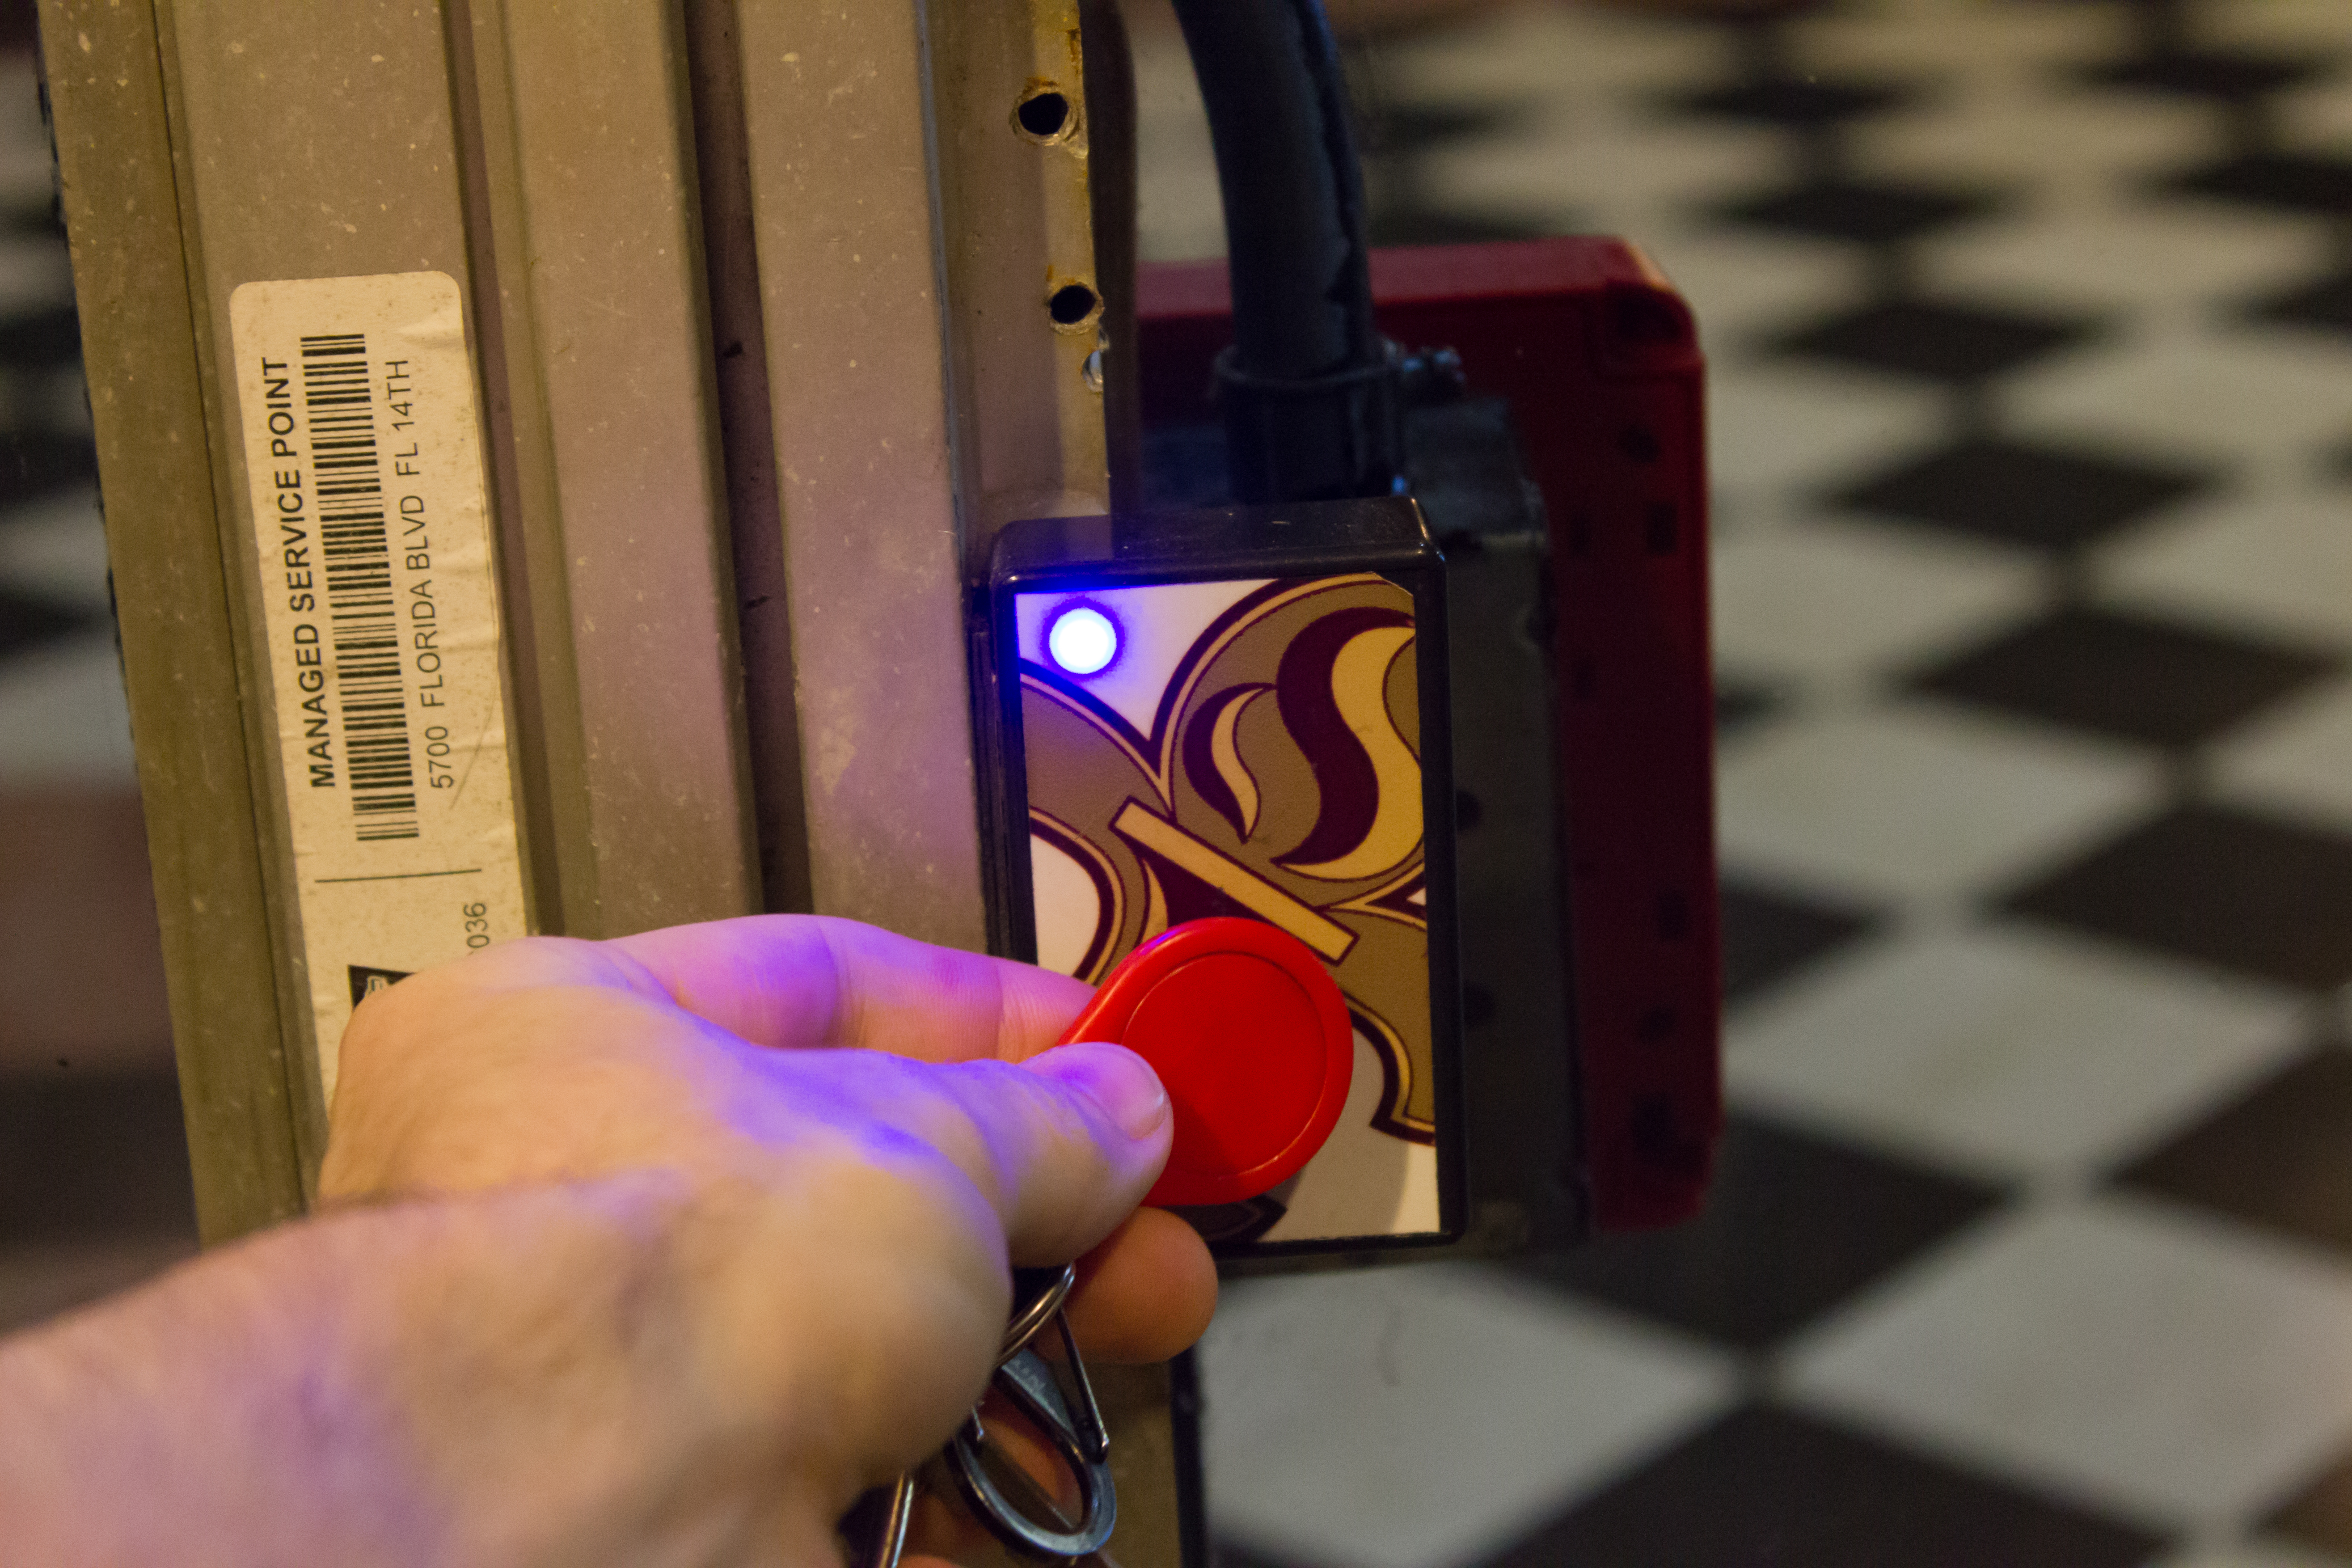
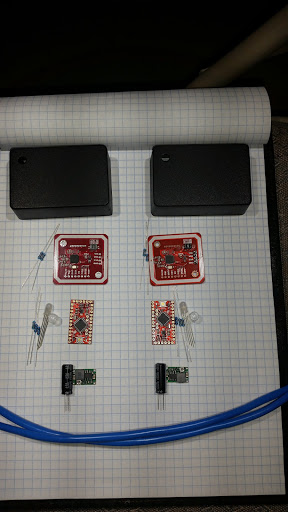
Following the initial prototype, dedicated door panels were developed as part of the system. These panels, like the rest of the architecture, were based on Arduino microcontrollers. Each panel incorporated a PN532 NFC card reader, a voltage regulator (with later versions utilizing switching regulators to minimize voltage drop), and an RGB LED for status indication.
Below are several photos of the door panels.
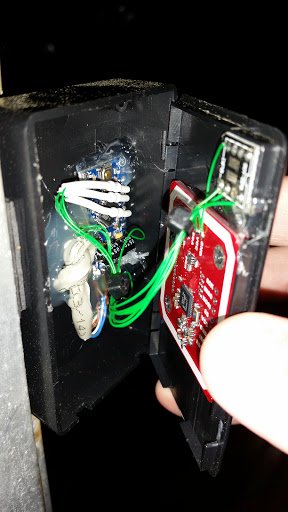

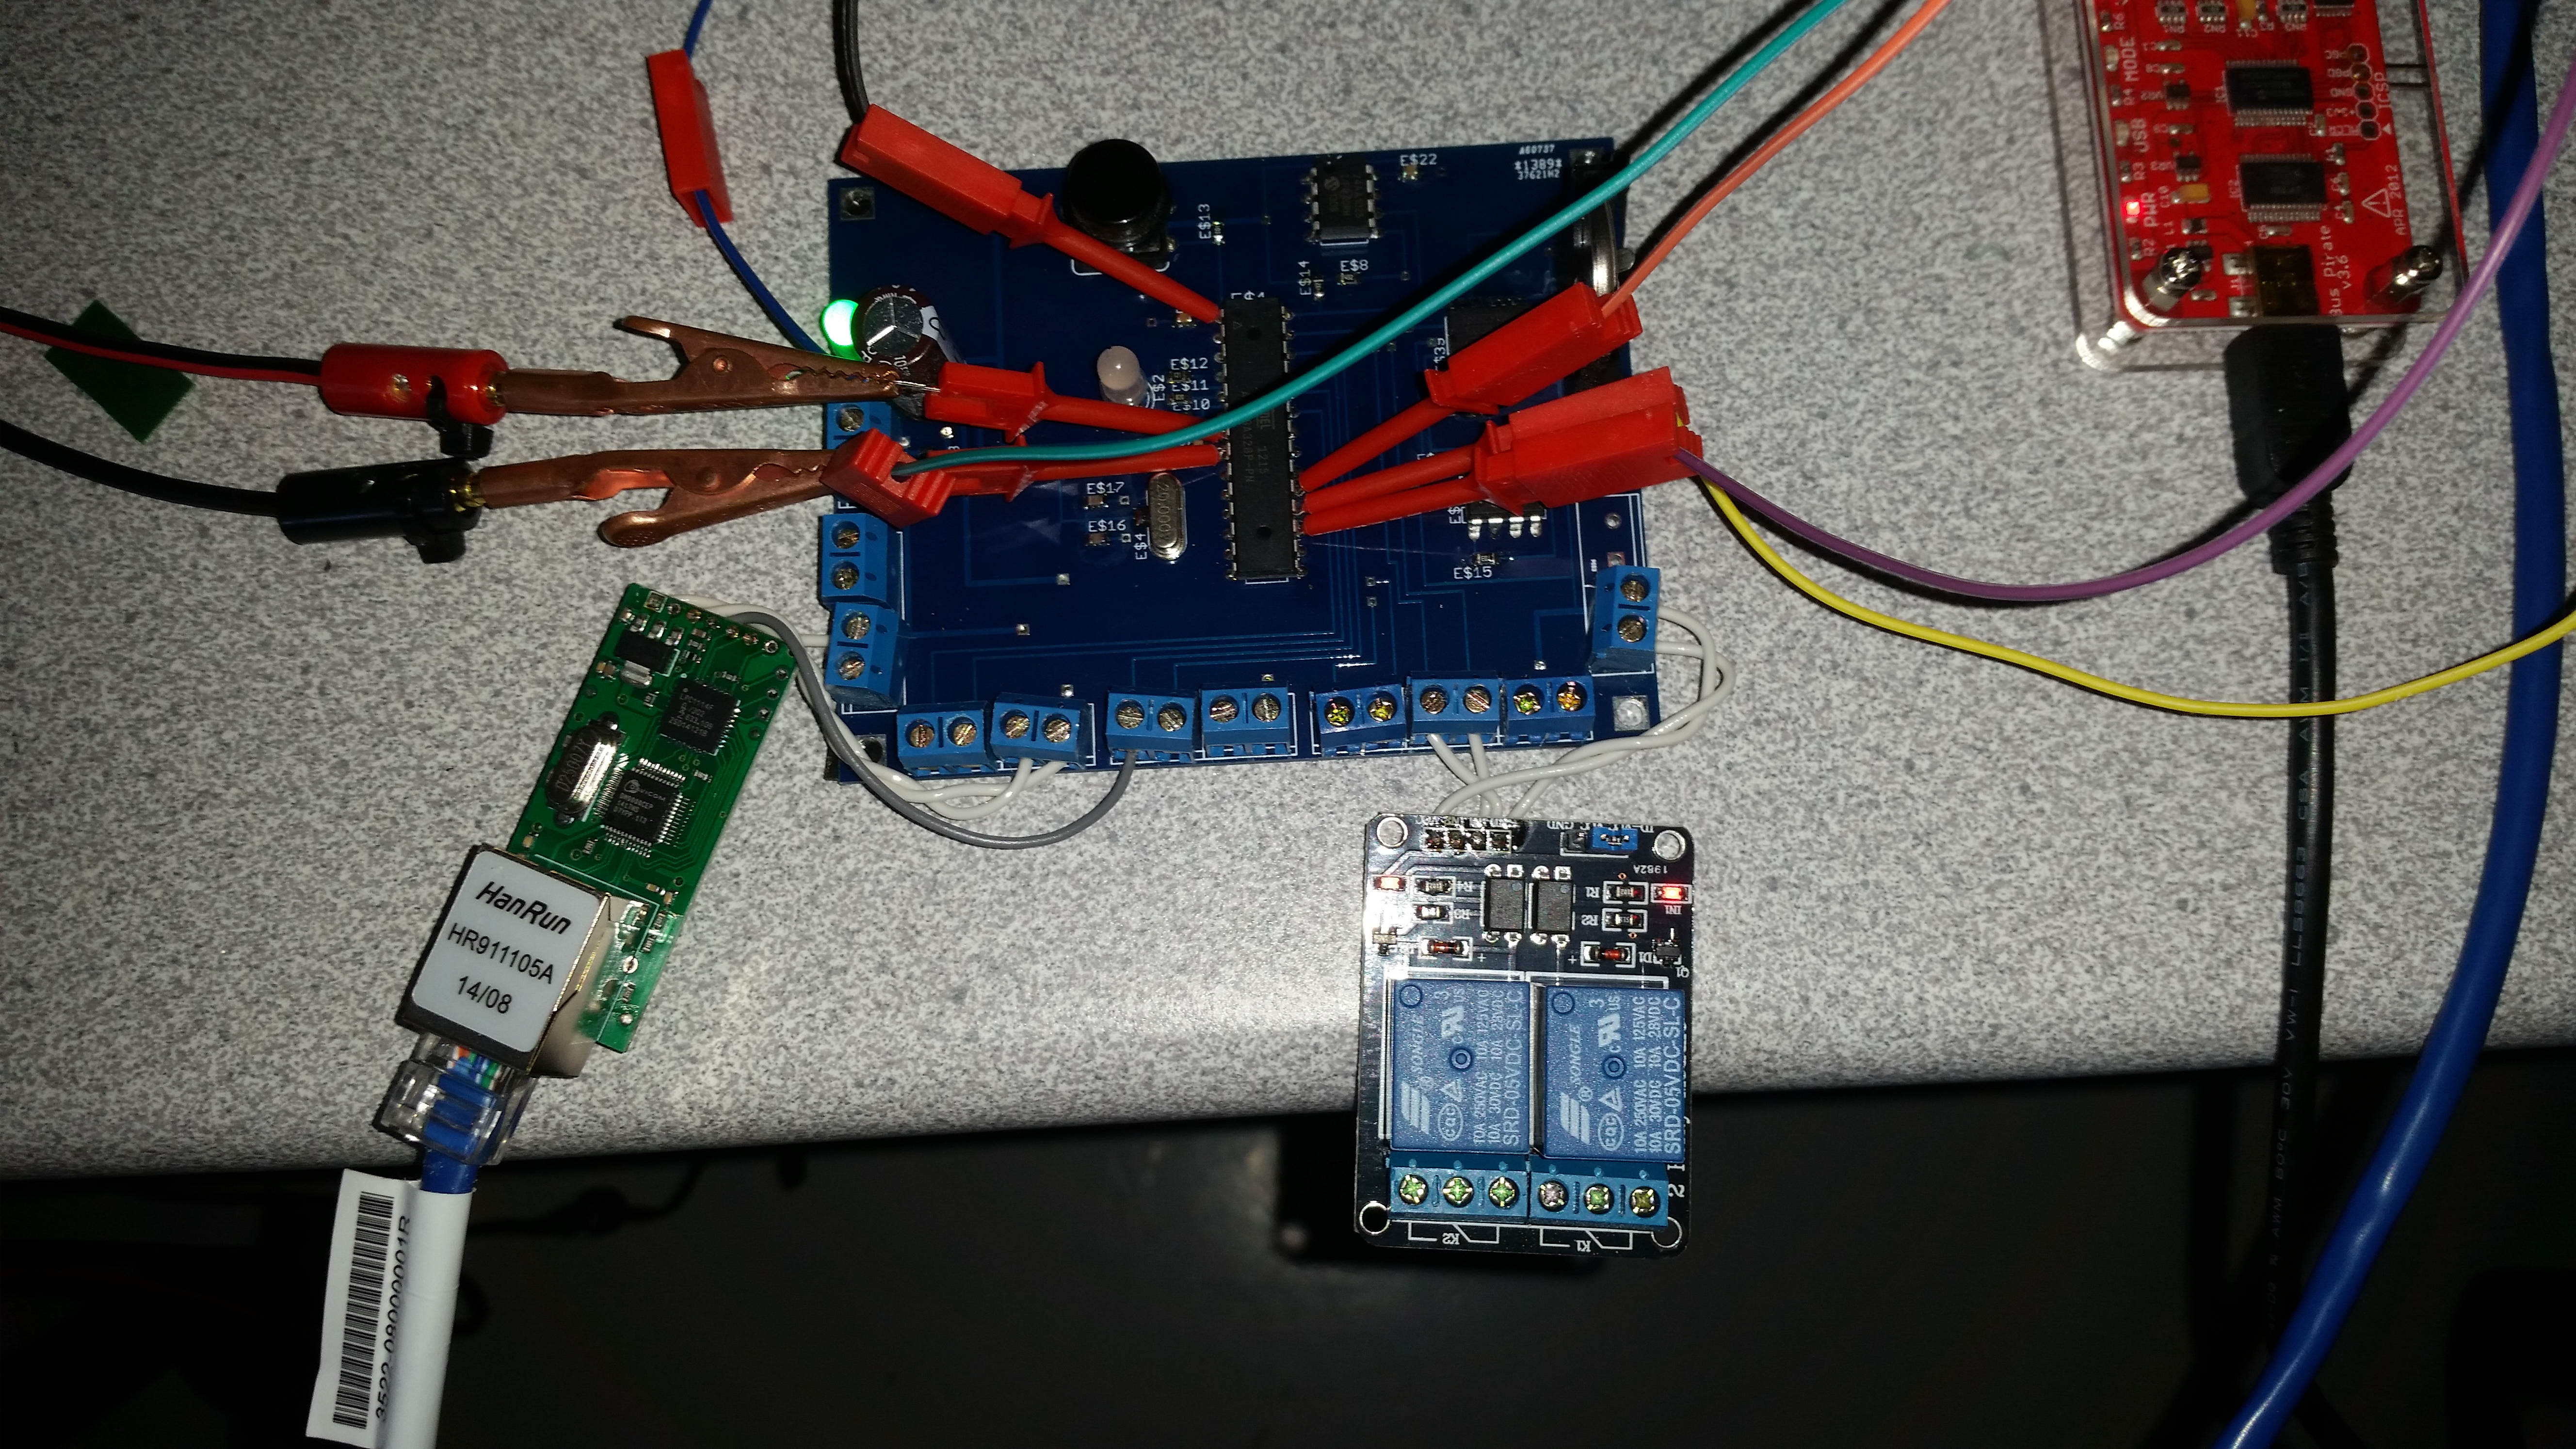
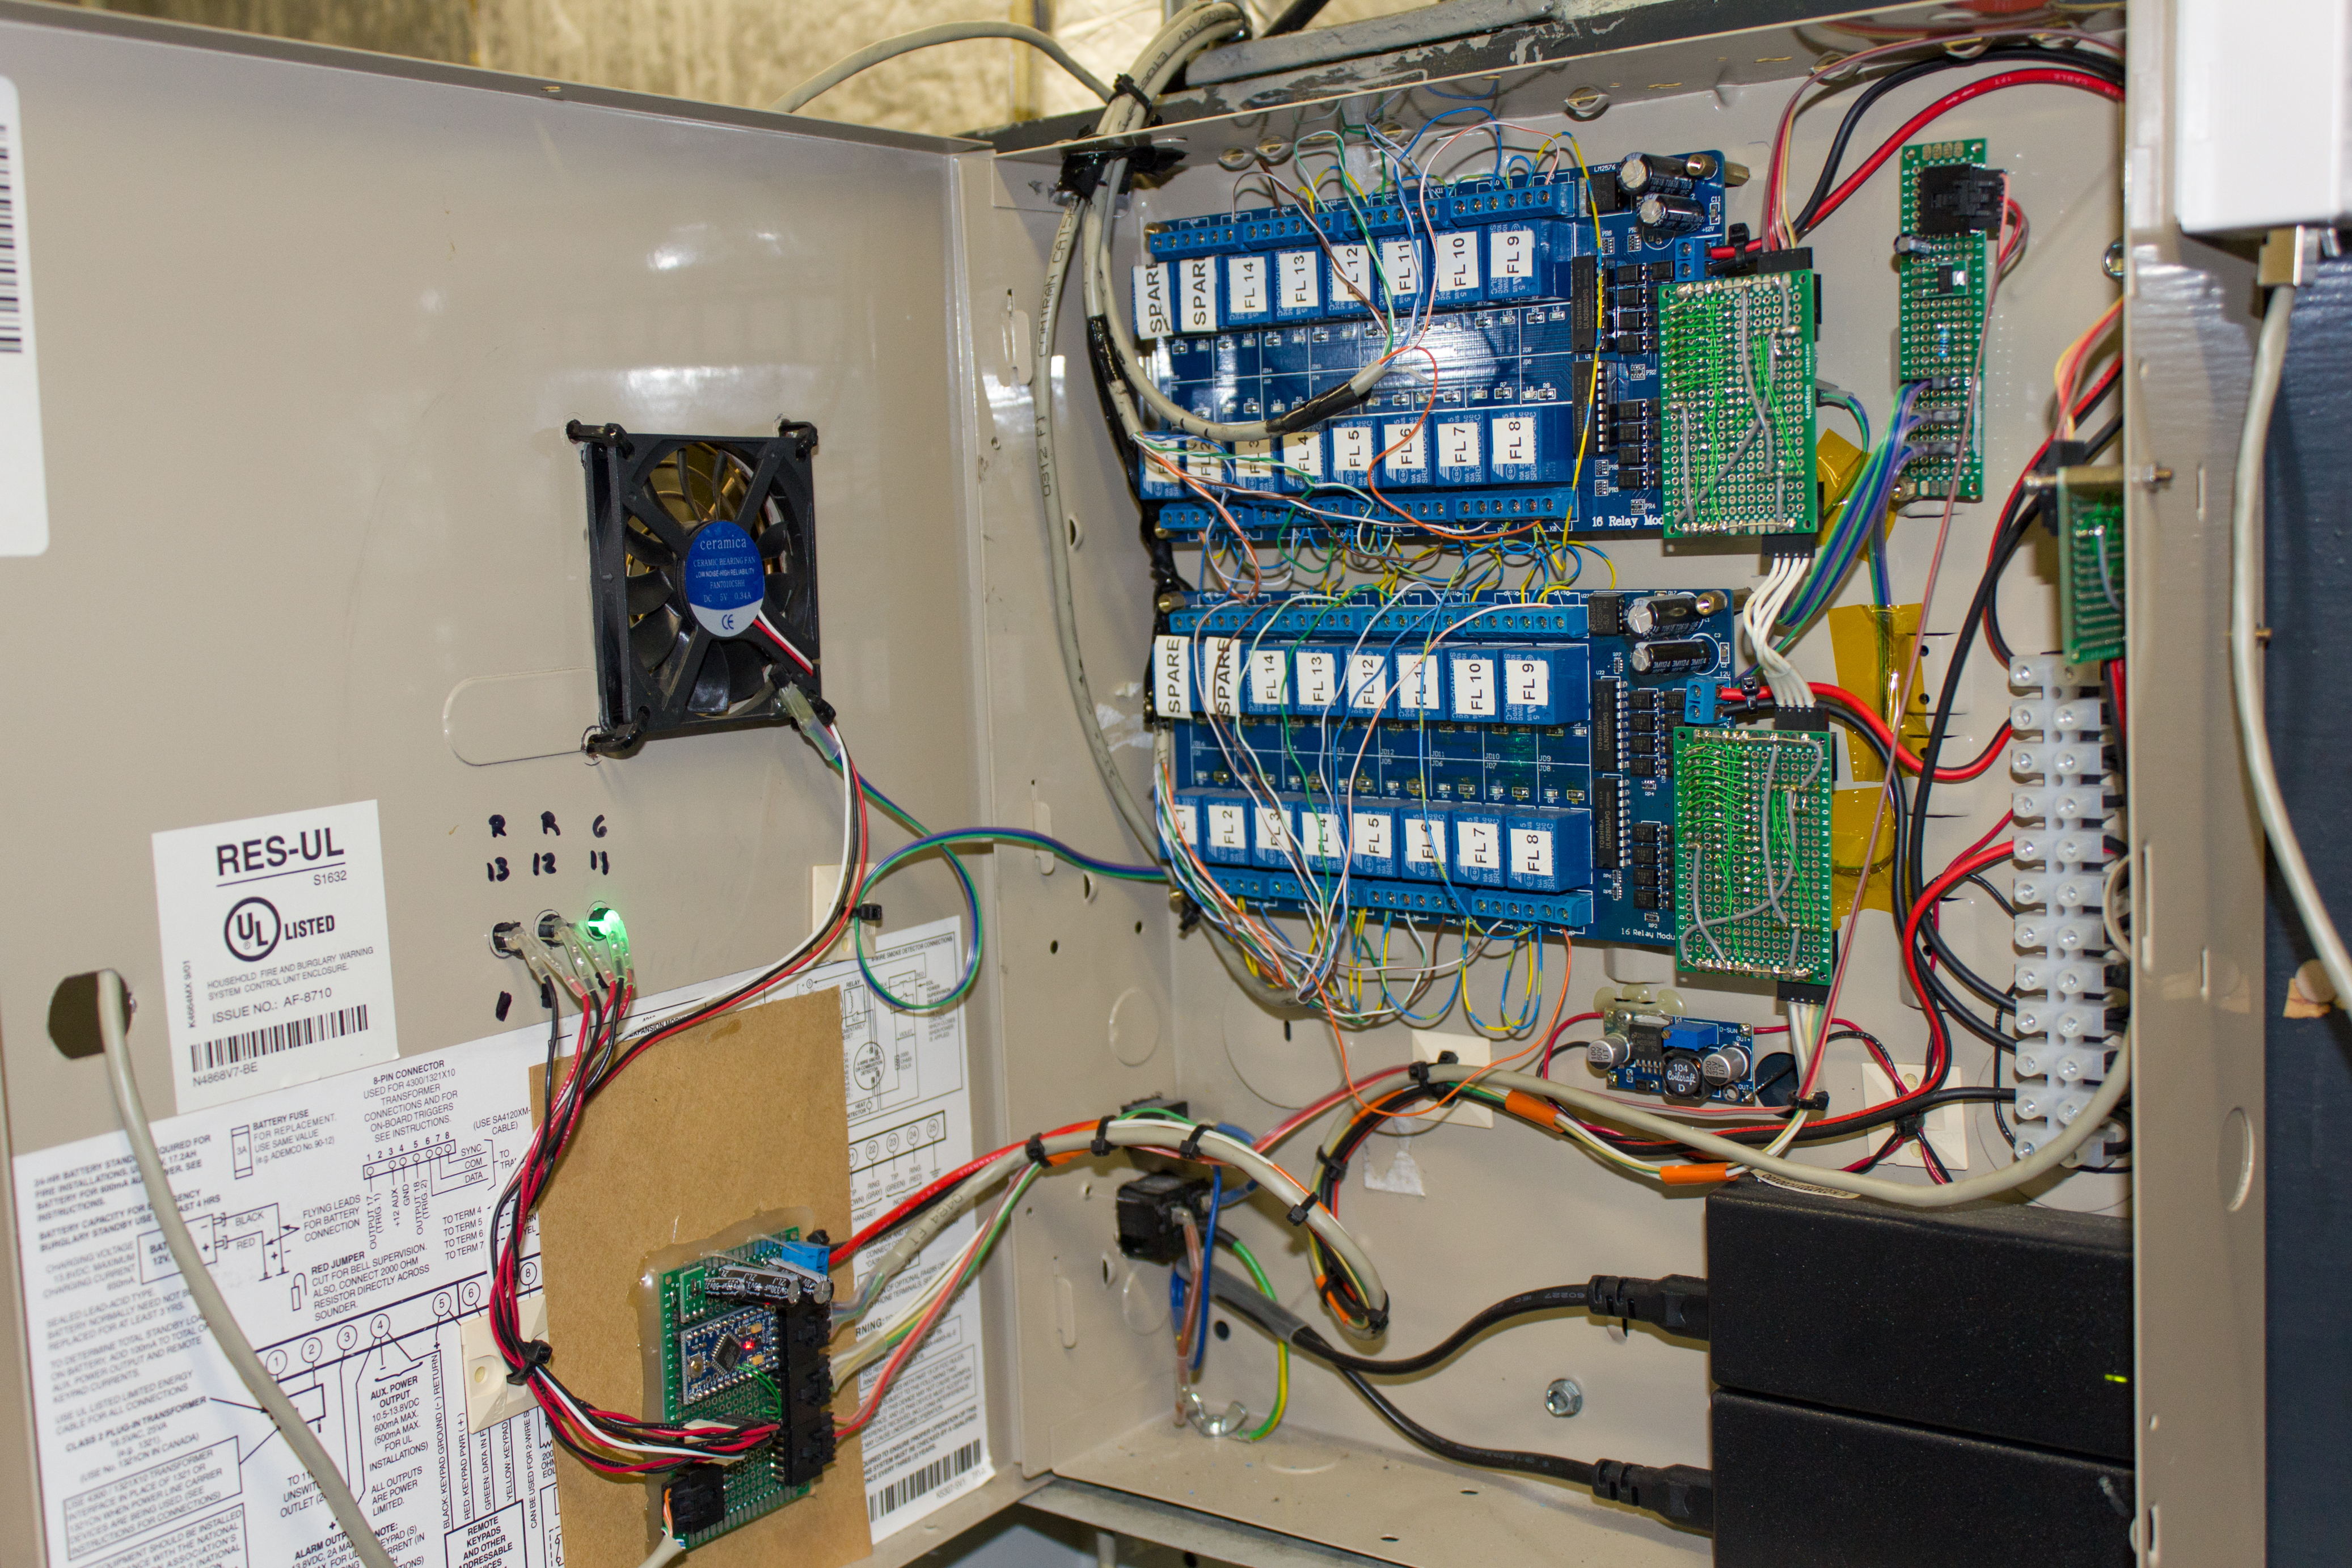
Following the deployment of the initial controller prototypes and door panels, the next logical progression was to consider integrating a PLC into the system. However, due to the higher cost of PLCs at the time and my limited experience with them, I opted to develop a custom solution tailored to our specific requirements for a networked relay box. This led to the development of the “expander”—a unit featuring two 16-channel relay boards, an Arduino controller, status LEDs, a fan with PWM control, an I2C power monitor, temperature sensors, and an external communication interface.
For a period, the expander included a built-in bypass that allowed a set of relays to be toggled by grounding a control wire. It was designed to integrate seamlessly with the elevator control system, operating alongside the original protoboard controller and within its existing limitations. While this configuration did not permit individual floor control via access cards, the expander itself was fully controllable over the network. This limitation was later addressed by connecting the panels to the network and integrating them into the new MQTT-based system.
A dedicated form within the MCI application provided convenient access to expander controls, which were frequently utilized. Subsequently, an MQTT server was implemented, enabling tenants to remotely lock and unlock their respective floors. This functionality was primarily developed for the main tenant, who occupied the entire fifth floor of the building.
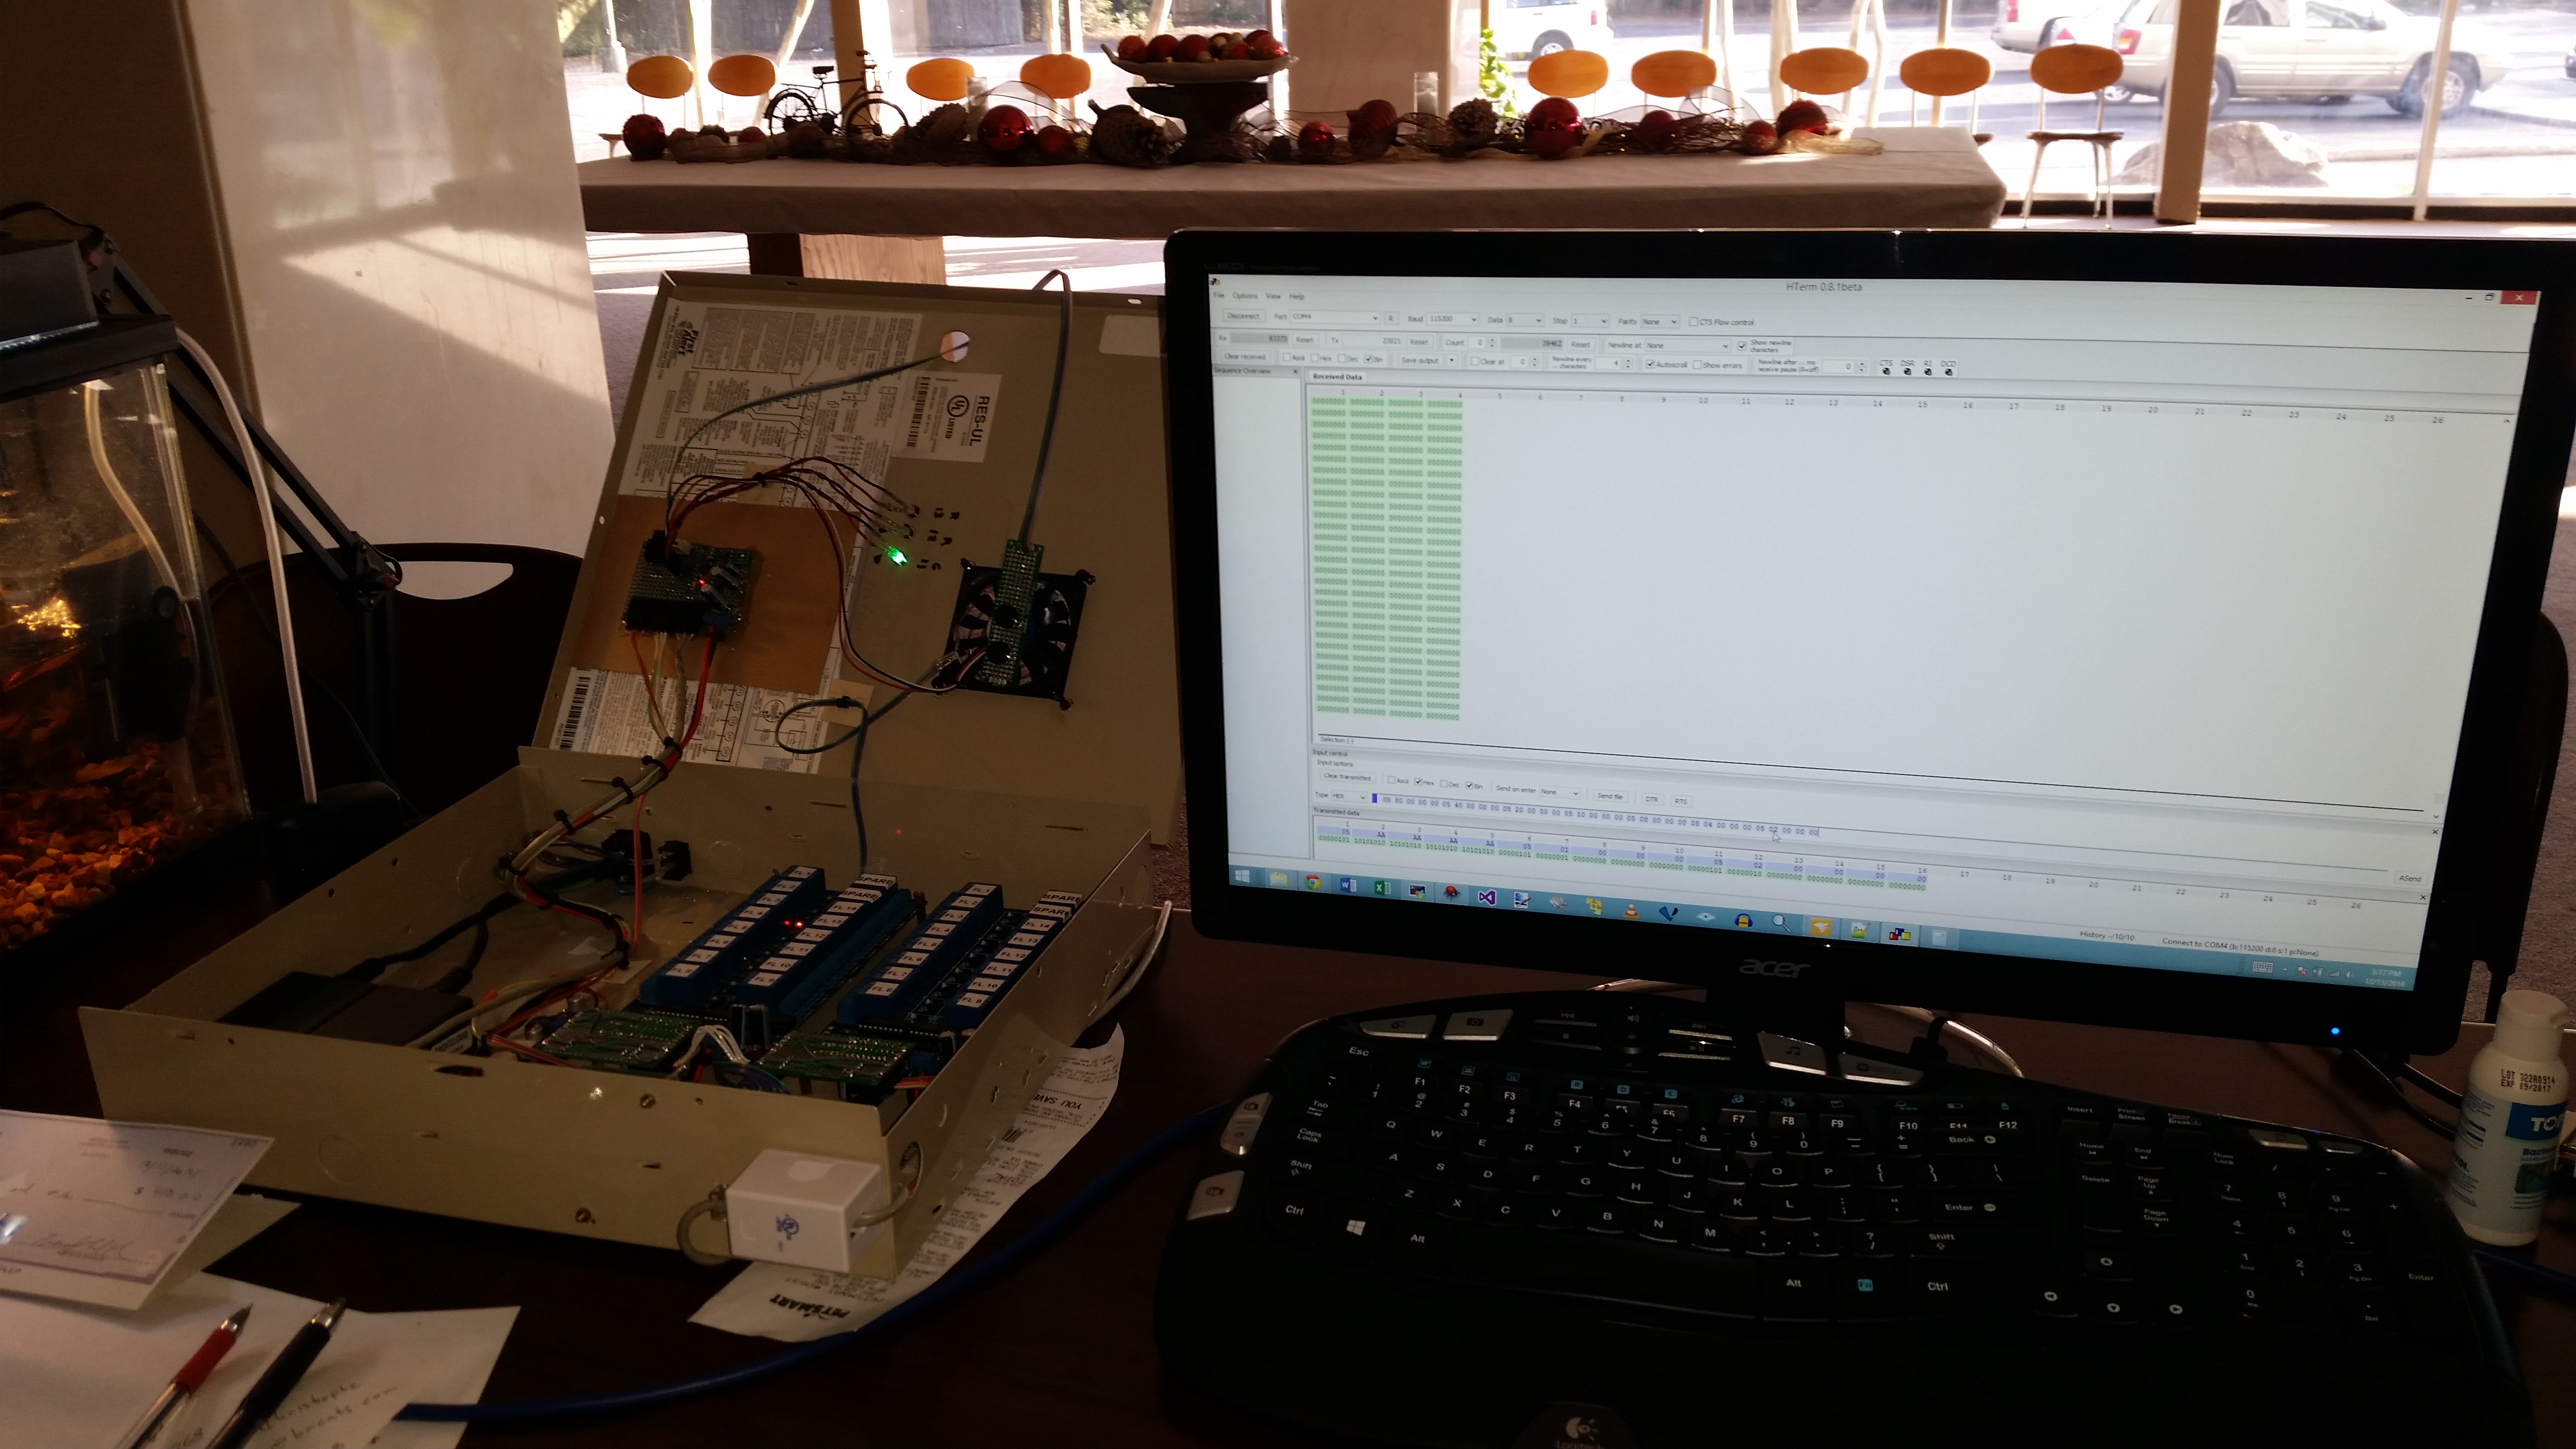
Here are some photos of the expander.
The Master Controller Interface
The following is mostly a copy and paste from the GitHub readme.
MasterController v2 Suite is an offline access control and building device management system. It allows administrators to manage RFID card access (store and sync card UIDs to door controllers), monitor and control building hardware (door locks, sensors, relays), and interface with external systems (e.g., via MQTT for web dashboards). The suite includes a Windows desktop application for configuration and monitoring, and background services for real-time device communication.
C# (.NET 4.6.1) with WinForms for the admin UI. MySQL database for storing users, cards, and device data. Entity Framework 6 (planned integration) – currently using MySQL Connector/ADO.NET for data access. Windows Service components for hardware communication (sockets, UDP broadcasts, MQTT messaging). Integration of third-party libraries: MQTT (for IoT messaging), BouncyCastle (cryptography), EPPlus (Excel import/export), etc.
The core functionality (card management, device interfacing, etc.) is in place and was tested in a live environment with legacy hardware controllers. Some features (e.g., initial database setup, SIP integration, and video monitoring) are prototypes or pending completion. Given more time, I would improve this project by migrating to Entity Framework (to simplify database interactions) and adding a setup wizard to handle first-time database initialization. I would also refactor some modules for better separation of concerns (e.g., decouple the service logic from the UI).
Feel free to explore the code; notable sections include the custom MySQL connection pool in MCICommon and the DeviceServer service that manages device networks.
This project was developed as a prototype for a building security system in a 12 story building. It successfully controlled 30 doors in real-time.